Shipment Builder
Note
You can build multi-stop shipments with orders only with Pending status.
A multi-stop shipment is a shipment that consists of an origin and a destination and one or more intermediary stops where freight is either picked up or dropped off. For example, a shipment might travel from Location A → Location B → Location C, picking up freight at A, dropping half of it off at B, and the remainder off at C.
Create a multi-stop shipment
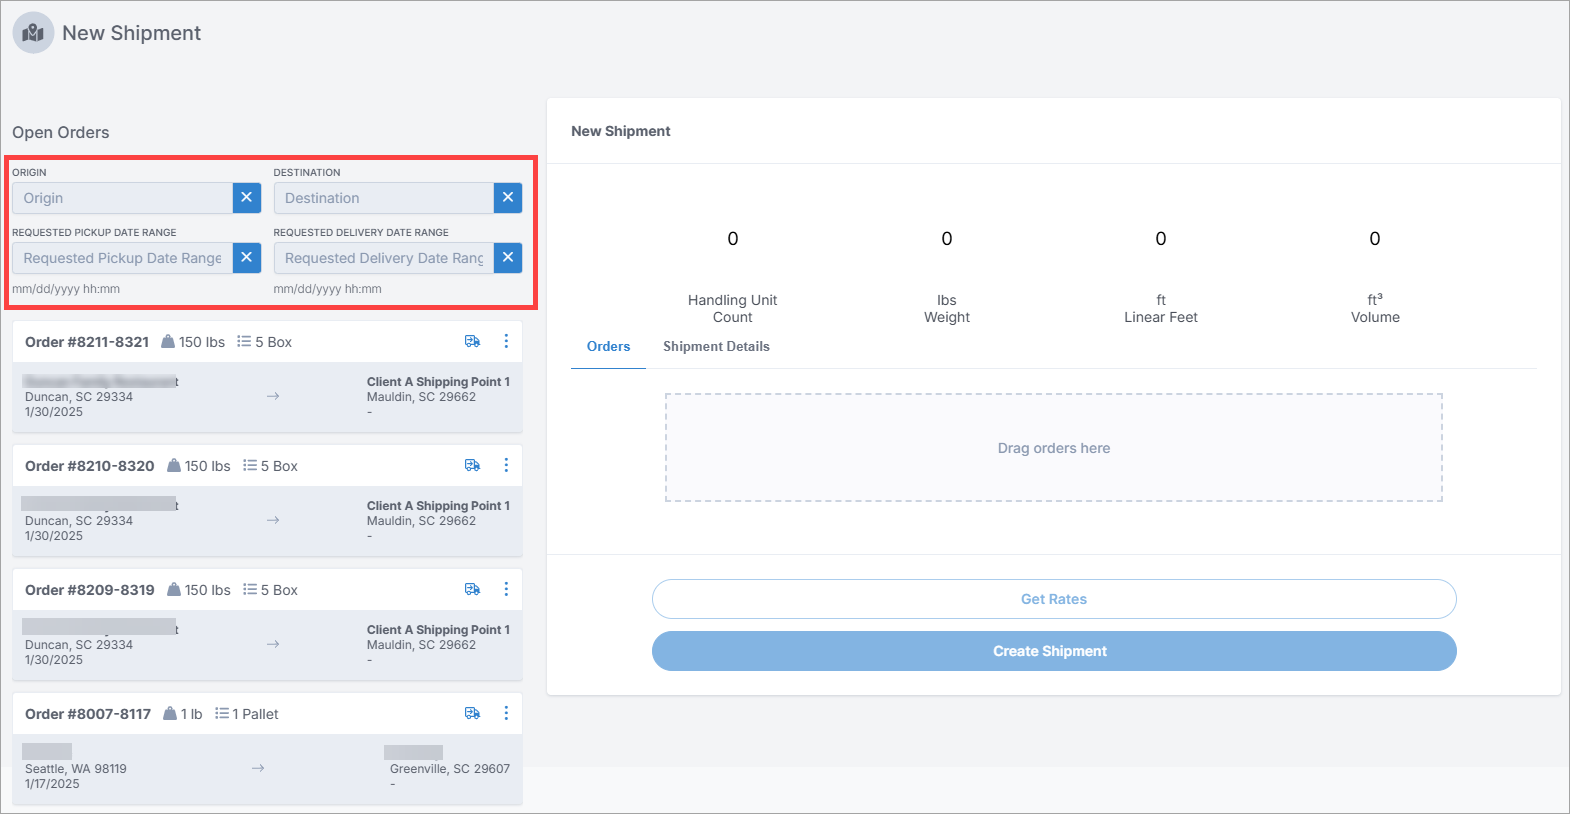
The Shipment Builder displays your pending orders so you can drag and drop any of them to create multi-stop shipments.
On the New Shipment page, you can use the filter options to sort the list of orders according to specific criteria.
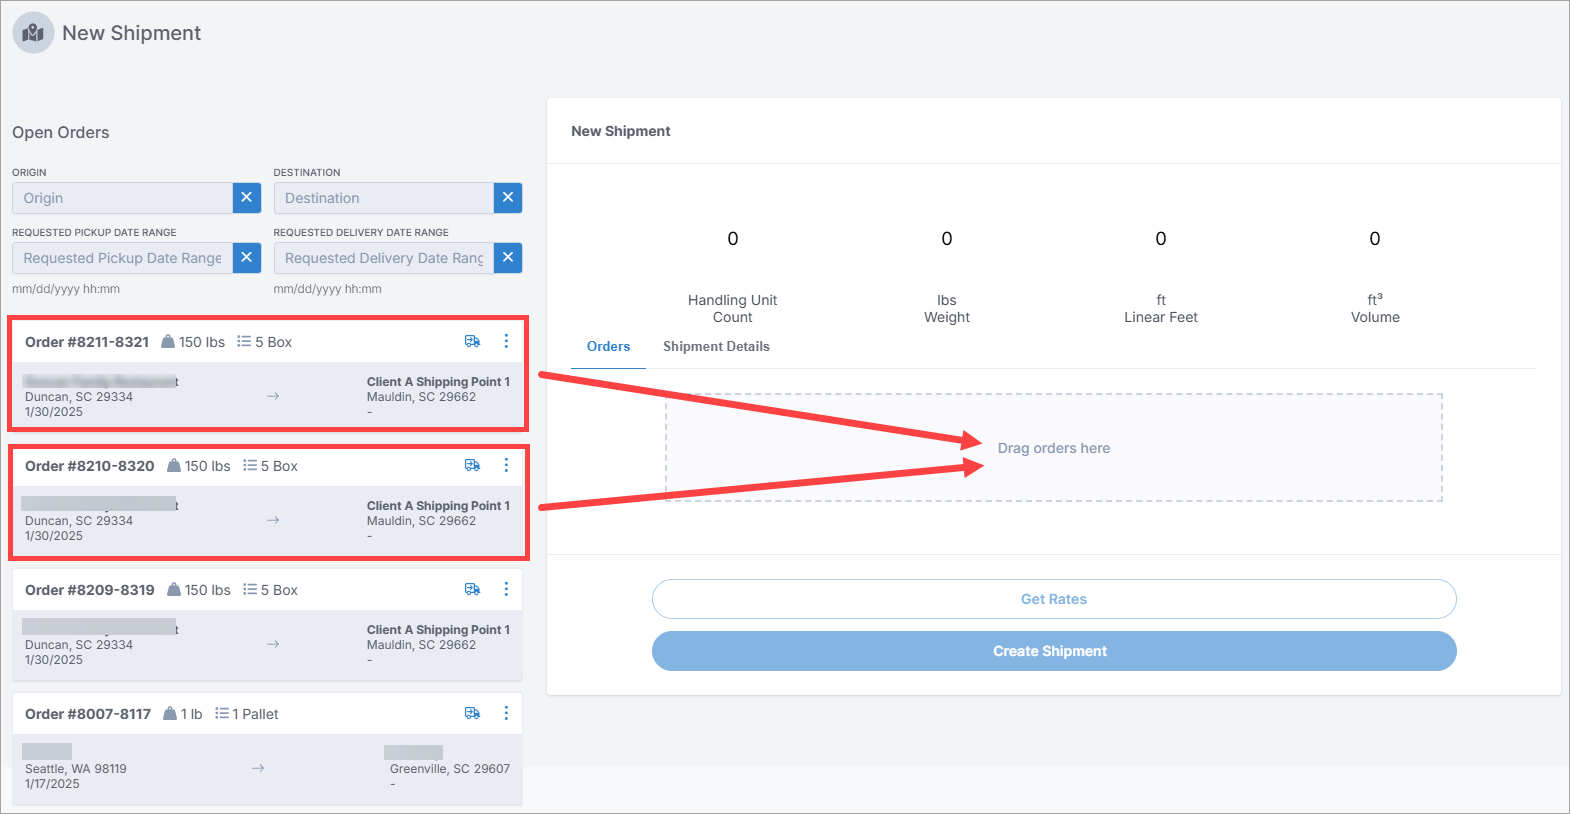
Drag and drop one or more orders from the list of orders into the New Shipment section.
Note
You can split an order in two before adding it to the shipment. See Split an order below for more information.
Note
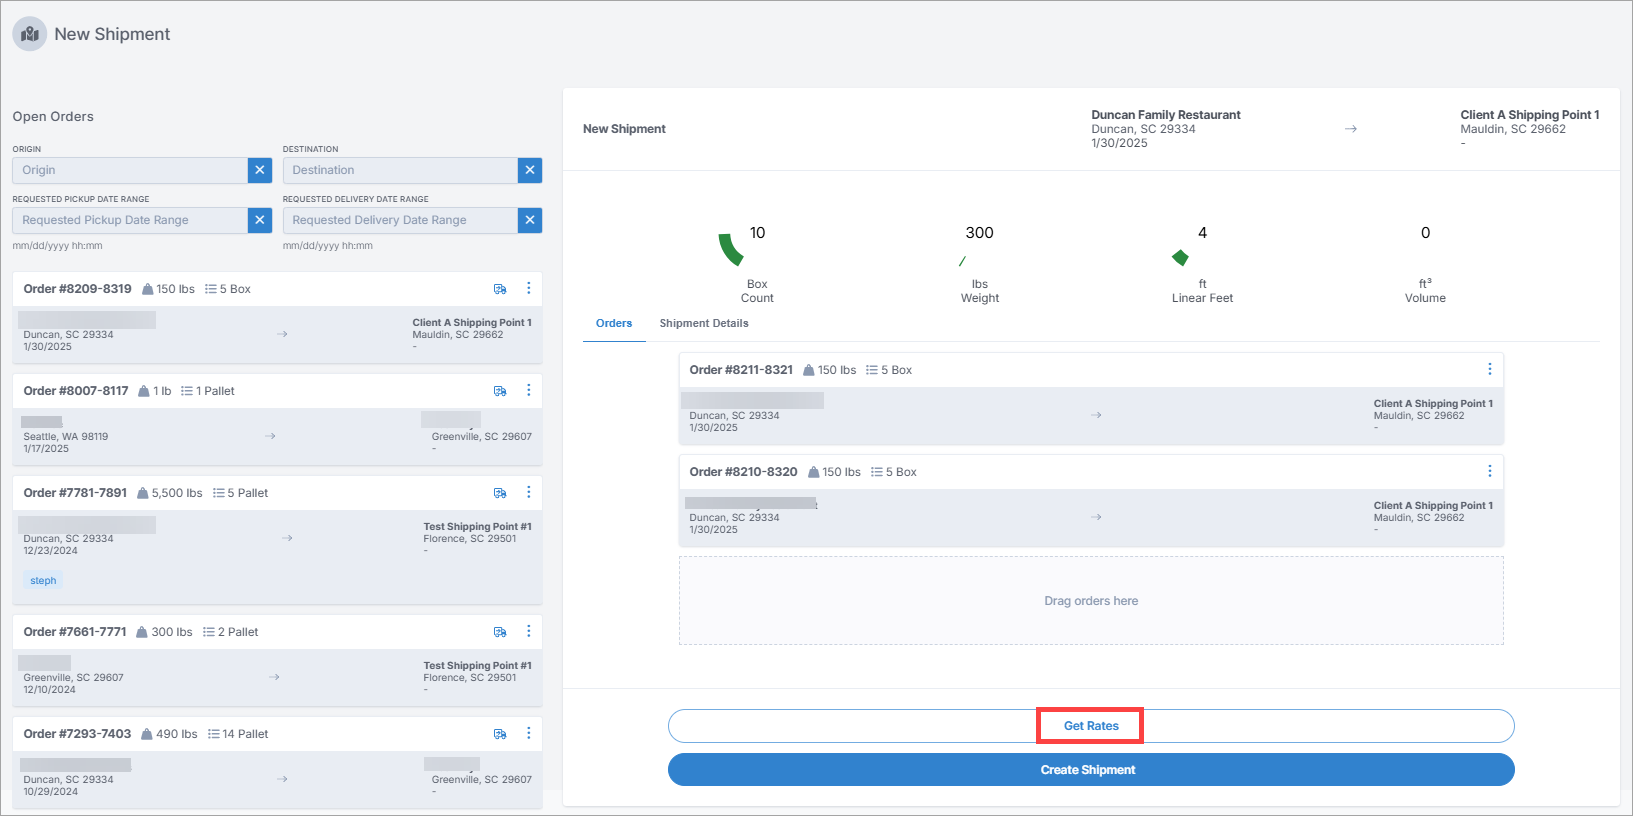
Drag and drop each order in the sequence that you want in the shipment.
If you don't want to drag and drop the orders, you can select the truck icon
 to add each order to the shipment.
Select Get Rates.
Select the rate you want for the shipment.
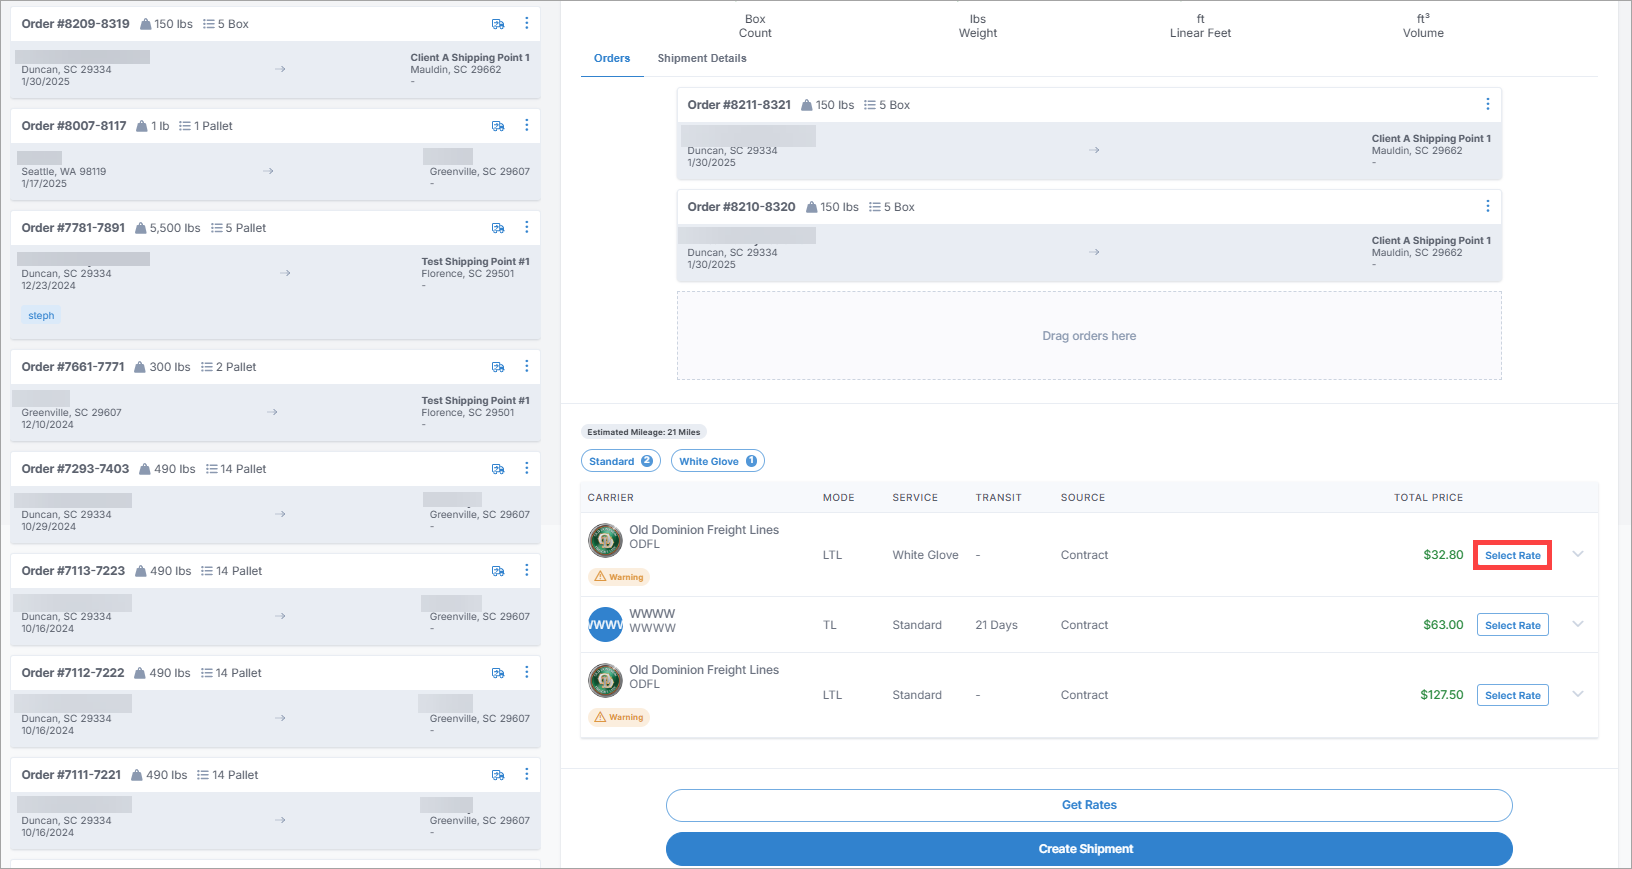
Select Create Shipment.
Note
After you create a multi-stop shipment, Corsair sets the cost allocation for the shipment.
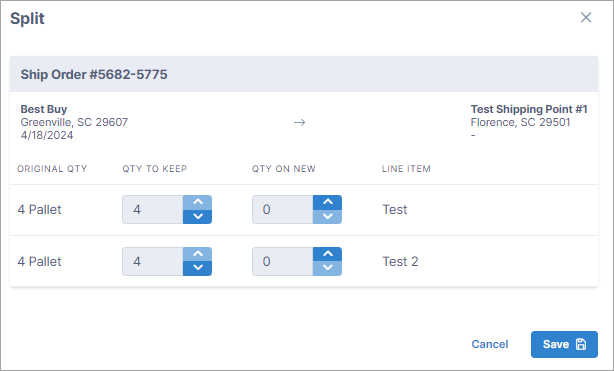
You can split an order into separate ship orders before creating a shipment.
For example, you have an order with eight pallets. You want to split the order into two ship orders so that you can create a separate shipment for each ship order.
The order contains two line items (each with four pallets). You want to split the order by keeping four pallets in the original order and creating another order that contains the other four pallets. The procedure below steps through this example scenario.
Note
When you split an order, you're splitting the order into two separate ship orders - not creating a completely new order. So both ship orders contain the same Order ID.
Complete steps 1 and 2 in the Create a multi-stop shipment procedure above.
Next to an order, select
 and select Split.
The Split dialog box displays.
In the QTY ON NEW fields, select to set the quantity as 2 for each line item.
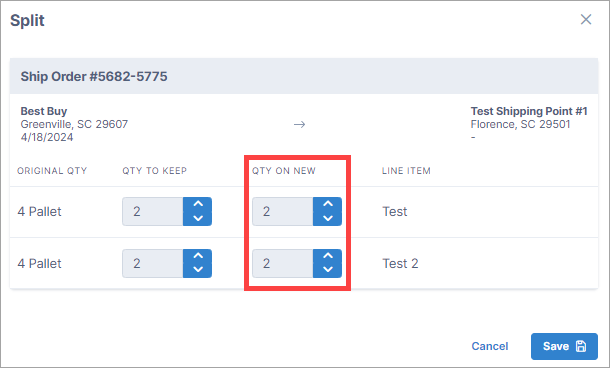
Select Save. Both ship orders display in the Open Orders list on the New Shipment page.
Note
The ship orders also display in the Order Itinerary section on the Order Details page of the order.
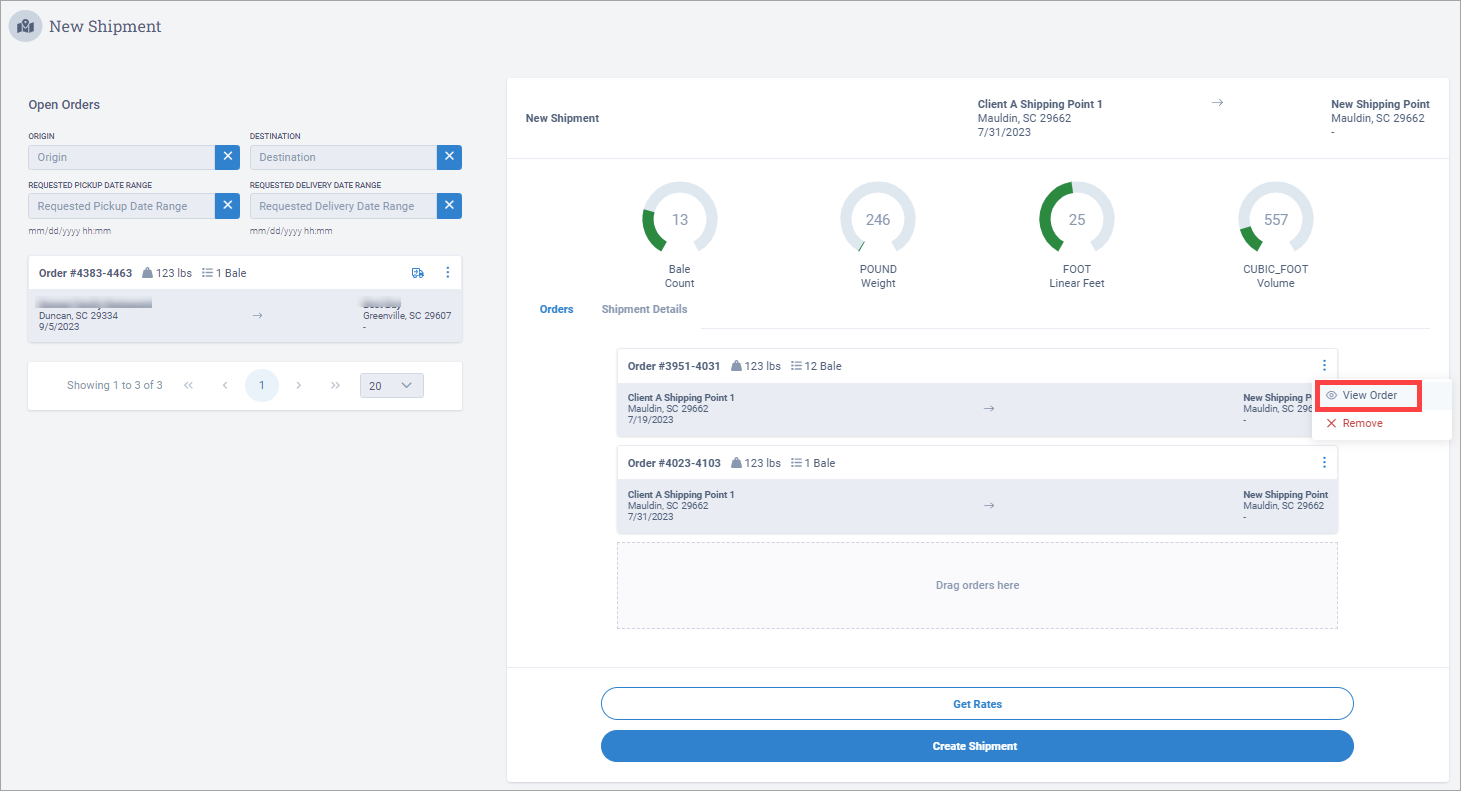
You can view the full details of an order before you select it.
Next to the order, select and select View Order.
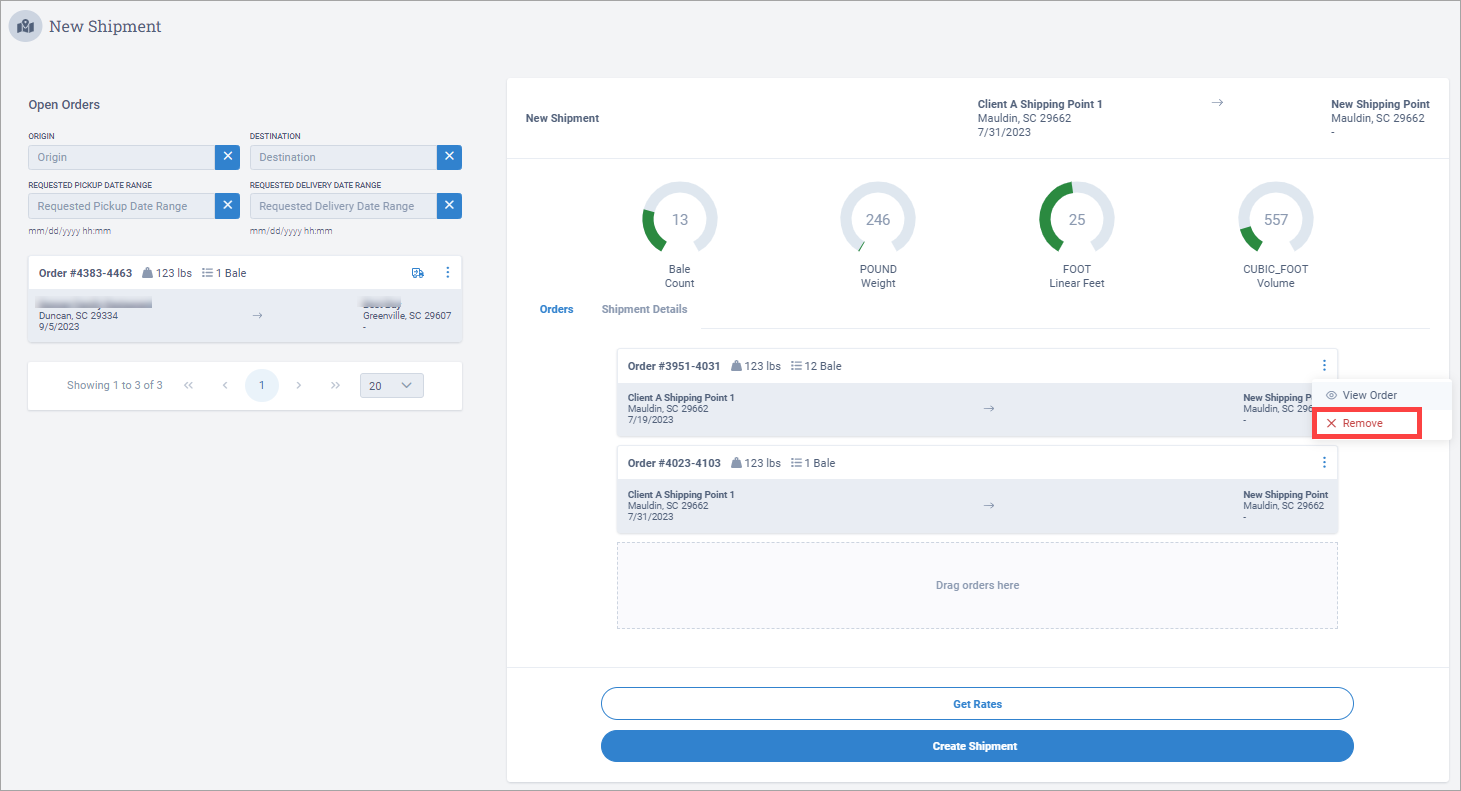
You can remove an order that you have selected and moved already.
Next to the order, select and select Remove.
After you create a multi-stop shipment, the shipment's cost is allocated across all its related orders automatically. The cost allocation calculations are according to how you set your cost allocation method.
You can view and edit the cost allocation totals:
In the Shipment Financials section, select View Cost Allocation. The Set Cost Allocation dialog box displays.
For example, you have a shipment containing two orders, and the cost allocation default is set to Even Split:
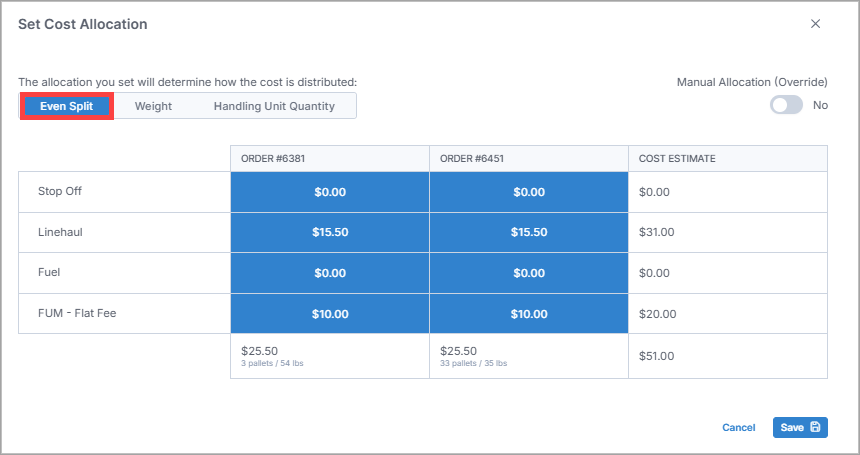
Note
Aside from the default cost allocation, you can select either of the other two allocation options to view their cost allocation breakdowns.
For example, in the following image, Even Split is the default cost allocation. So, select either Weight or Handling Unit Quantity to view their cost allocation breakdowns.

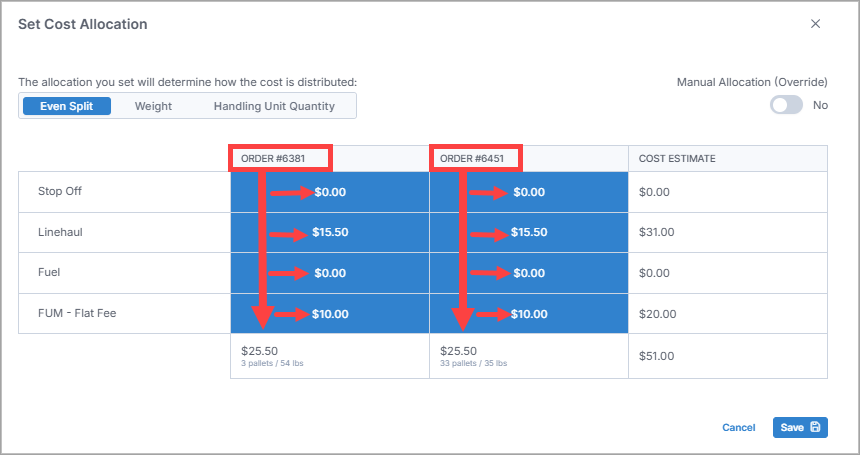
Also, notice that each order has its own column containing its cost allocation totals:
Optional: To edit the totals, select Manual Allocation (Override).
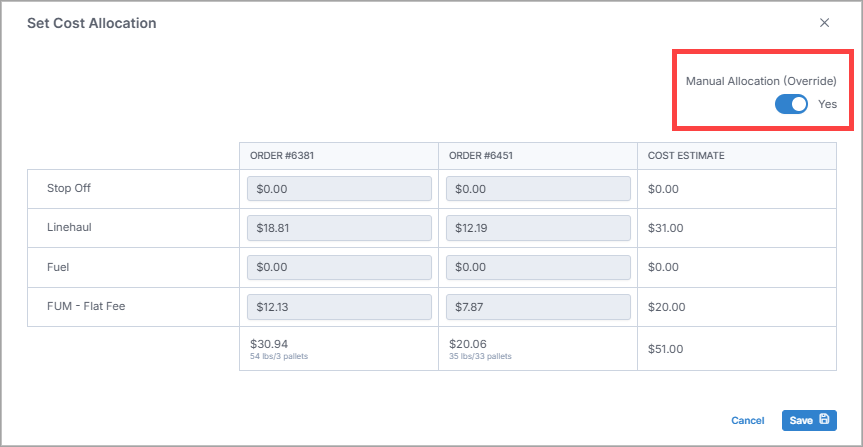
After you edit the information, select Save.