Service Agreements
A service agreement contains the details for how you bill a client, such as the payment terms , the bill run schedule, and such.
The Service Agreements page displays a list of all service agreements. Here you can view and create service agreements.
On the Service Agreements page, select the name of the service agreement you want to view.

On the Service Agreements page, you can search for a specific service agreement using the Search box.

In the top right corner of the Service Agreements page, select Create Service Agreement.

Tip
If you want to create a new service agreement, and all or most of its information will be the same as a current one, you can copy the current service agreement. Copying is a convenient way to avoid entering the same information multiple times.
To copy a service agreement, select Copy next to a service agreement.

On the Service Agreement page, enter the service agreement information and select Save Service Agreement. See the "Service Agreement Field Descriptions" below for more information about the new service agreement fields.
Service Agreement Field Descriptions
Section and Field | Description |
|---|---|
Name | Enter a relevant name. |
Description | Enter a brief description of the agreement. |
Recipient Type | Select either 3PL or Client. |
Client | If you selected Client for the recipient type, this is the name of the client in the service agreement. NoteYou can have only one service agreement per client. |
Third Party Logistics Provider | If you selected 3PL for the recipient type, this is the name of the third party logistics provider in the service agreement. NoteYou can have only one service agreement per client. |
Rollup Billing for Sub-Business Units? | The terms of the service agreement will apply to the client or 3PL and all its sub-business units. |
Recipient Billing Address | The billing address for the recipient. NoteThe billing address for the recipient is entered and stored in Settings. |
Net Payment Terms | The default is 30 days from the invoice date, according to industry standards. |
Billing Currency Unit | Select an international currency unit. |
Recipient Invoice Settings section | |
Invoice Number Prefix | The prefix that's specific to the client. |
Invoice Customization Setting | These criteria are set on the Invoice Customization page. |
Invoice Batching Option |
|
Included Reference Number Types on Invoice | Select one or more reference number types. |
Email Delivery Option |
|
Invoice Email Recipient(s) | The name of the person who receives the email invoices. NoteWhen entering multiple recipients, separate each recipient with a comma. |
Credit Allowances section | You can extend a set amount of credit to a client when you handle shipping their freight. NoteIf the limit is exceeded, the carrier can be assigned but not tendered. |
Maximum Allowable Credit Limit | Enter a dollar amount. |
Credit Limit Percentage | Enter a percentage of the client's credit limit. NoteWhen the credit limit is approaching, a message will display in Corsair to inform the client. |
Bill Run Schedule section | |
Start Date | The start date for the billing to run. |
Run Time | The length of time that the bill runs. |
Time Zone | The time zone that the bill runs in. |
Repeat | Set the billing cycle to repeat. |
End | The final day of the billing cycle. |
Exclude Dates | Exclude specific dates for the billing to run. For example, you can adjust a billing date if it occurs on a holiday. |
Include Dates | Additional dates to run the billing. |
Billing Segments section | Billing segments allow you to split billing into multiple summary invoices. Each billing segment can have its own schedule, charges, and shipments allocated to it. |
Shipment Charge Groups section | |
Add Shipment Charge Group | See the Add a shipment charge group to a service agreement procedure below. |
Cargo Insurance Uplift section | |
Add Cargo Insurance Uplift | See the Add cargo insurance uplift to a service agreement procedure below. |
Rate Audit Tolerance section | |
Type | Acceptable criteria for your rate audits measured in percentages, flat rates, and so on. |
Recurring Charge Groups section | |
Add Charge Group | See the Add a recurring charge group to a service agreement procedure below. Charges that are regularly scheduled. |
One-Off Charges section | |
Add One-Off Charge | See the Add a one-off charge to a service agreement procedure below. |
Billing segments allow you to split a single service agreement into multiple service agreements for the same client. Each billing segment can have its own schedule, charges, shipments, and invoice allocated to it.
Note
You can add a billing segment only to a saved service agreement.
On the Service Agreements page, select a service agreement.
In the Billing Segments section, select Add Billing Segment.

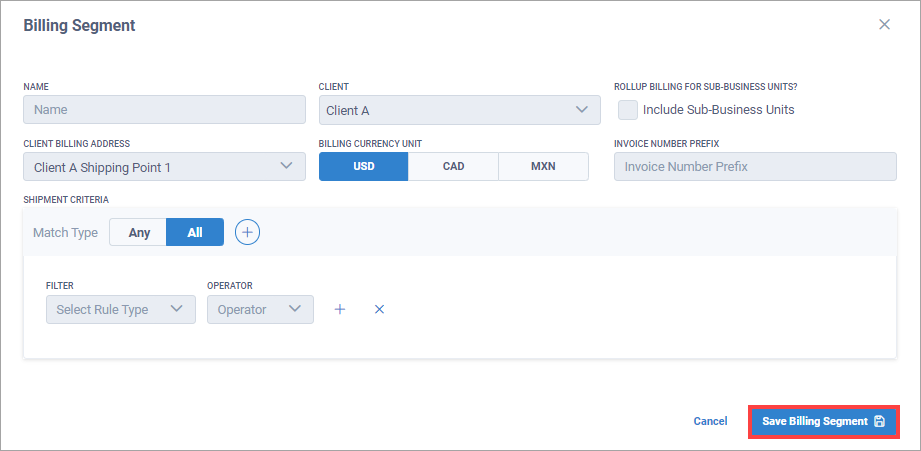
In the Billing Segment dialog box, enter the billing segment information and select Save Billing Segment. See the "Billing Segment Field Descriptions" below for more information about the new order fields.
At the bottom of the Service Agreement page, select Save Service Agreement.
Billing Segment Field Descriptions
Field | Description |
|---|---|
Name | Enter a relevant name. |
Client | The name of the client being billed. |
Rollup Billing for Sub-Business Units? | The terms of the billing segment will apply to the client and all its sub-business units. |
Client Billing Address | Billing address for the client. NoteThe billing address for the client is entered and stored in Settings. |
Billing Currency Unit | Select an international currency unit. |
Invoice Number Prefix | The prefix that's specific to the client. |
Shipment Criteria | The shipments that are included in the billing segment. Use the filtering options to create rules and invoices to determine which shipments are included in a billing segment. NoteIf a shipment doesn't meet the conditions of the rules, the shipment will fall under the terms of the original parent service agreement. |
A shipment charge group defines shipment charges according to a specific service agreement. It displays as a line item on an invoice.
You can add a shipment charge group to a service agreement you create or edit.
On the Service Agreements page, select a service agreement.
In the Shipment Charge Groups section, select Add Shipment Charge Group.

Enter the shipment charge group information and select Confirm Changes. See the "Shipment Charge Group Field Descriptions" below for more information about the new order fields.
Note
You can select Add Shipment Charge to add another shipment charge to the group.
At the bottom of the Service Agreement page, select Save Service Agreement.
Shipment Charge Group Field Descriptions
Section and Field | Description |
|---|---|
Charge Template | Set in the From Shipment Charge Templates section. |
Name | Enter a relevant name. |
Charge Code | Accessorial charge codes. |
Description | Enter a brief description of the shipment charge group. |
Usage section | |
Usage Type | Usage types are custom entries that we help you create during initial onboarding with Corsair. |
Pricing section | |
Billing Scheme |
|
Currency | Select an international currency unit. |
Amount | Shipment charges are set according to the terms of the service agreement. |
Shipment Criteria section | |
Filter which shipments this charge will apply to. | Match the filtering for any or all shipments. Select a filter type. Select an operator. |
Effectivity Period section | |
Effective Date | The start date of the shipment charge group. |
Expiration Date | The expiration date of the shipment charge group. |
After entering the shipment charge group information, select Apply Discount to Group.
Enter the discount information and select Confirm Changes. See the "Apply Discount to Group Field Descriptions" below for more information about the new order fields.
Apply Discount to Group Field Descriptions
Section and Field | Description |
|---|---|
Discount Template | Set in the Discount Templates section. |
Name | Enter a relevant name. |
Charge Code | Accessorial charge codes. |
Description | Enter a brief description of the discount. |
Usage section | |
Usage Type | Usage types are custom entries that we help you create during initial onboarding with Corsair. |
Pricing section | |
Billing Scheme |
|
Currency | Select an international currency unit. |
Amount Per Unit | Enter the discount amount per unit. |
In a shipment charge group, in a charge, select Apply Discount to Charge.

Enter the discount information and select Confirm Changes. See the "Apply Discount to Charge Field Descriptions" below for more information about the new order fields.
Apply Discount to Charge Field Descriptions
Section and Field | Description |
|---|---|
Discount Template | Set in the Discount Templates section. |
Name | Enter a relevant name. |
Charge Code | Accessorial charge codes. |
Description | Enter a brief description of the discount. |
Usage section | |
Usage Type | Usage types are custom entries that we help you create during initial onboarding with Corsair. |
Pricing section | |
Billing Scheme |
|
Currency | Select an international currency unit. |
Amount Per Unit | Enter the discount amount per unit. |
A 3PL with a Loadsure partnership can specify a default uplift on the freight insurance they provide for their clients.
On the Service Agreements page, select a service agreement.
In the Cargo Insurance Uplift section, select Add Cargo Insurance Uplift.
Enter the cargo insurance uplift information and select Save Service Agreement.
Cargo Insurance Uplift Field Descriptions
Field | Description |
|---|---|
Type | Criteria for the uplift can be measured in one of the following:
|
Minimum Uplift Amount | Optionally set a minimum amount in dollars. |
Maximum Uplift Amount | Optionally set a maximum amount in dollars. |
You can add a recurring charge group to a service agreement that you create or edit.
On the Service Agreements page, select a service agreement.
In the Recurring Charge Groups section, select Add Charge Group.

Enter the recurring charge group information and select Confirm Changes. See the "Recurring Charge Group Field Descriptions" below for more information about the new order fields.
At the bottom of the Service Agreement page, select Save Service Agreement.
Recurring Charge Group Field Descriptions
Section and Field | Description |
|---|---|
Every Bill Run | This is set in the From Shipment Charge Templates section. |
Charge Template | This is set in the From Shipment Charge Templates section. |
Name | Enter a relevant name. |
Charge Code | Accessorial charge codes. |
Description | Enter a brief description of the recurring charge group. |
Usage section | |
Usage Type | Usage types are custom entries that we help you create during initial onboarding with Corsair. |
Pricing section | |
Billing Scheme |
|
Currency | Select an international currency unit. |
Amount | Shipment charges are set according to the terms of the service agreement. |
Effectivity Period section | |
Effective Date | The start date of the recurring charge group. |
Expiration Date | The expiration date of the recurring charge group. |
One-off charges are one-time charges applied to the next bill run, typically for an additional service.
You can add a one-off charge to a service agreement you create or edit.
On the Service Agreements page, select a service agreement.
In the One-Off Charges section, select Add One-Off Charge.

Enter the following information:
Charge Code - Charge codes are set up during initial onboarding.
Charge Description - Enter a brief description of the charge.
Amount - Shipment charges set according to the one-off terms.
Select Confirm Changes.
At the bottom of the Service Agreement page, select Save Service Agreement.
To ensure a service agreement is set up properly, you can run a test scenario for it and generate a sample invoice.
On the Service Agreements page, select a service agreement.
In the top right corner of the page, select Scenario Tester.

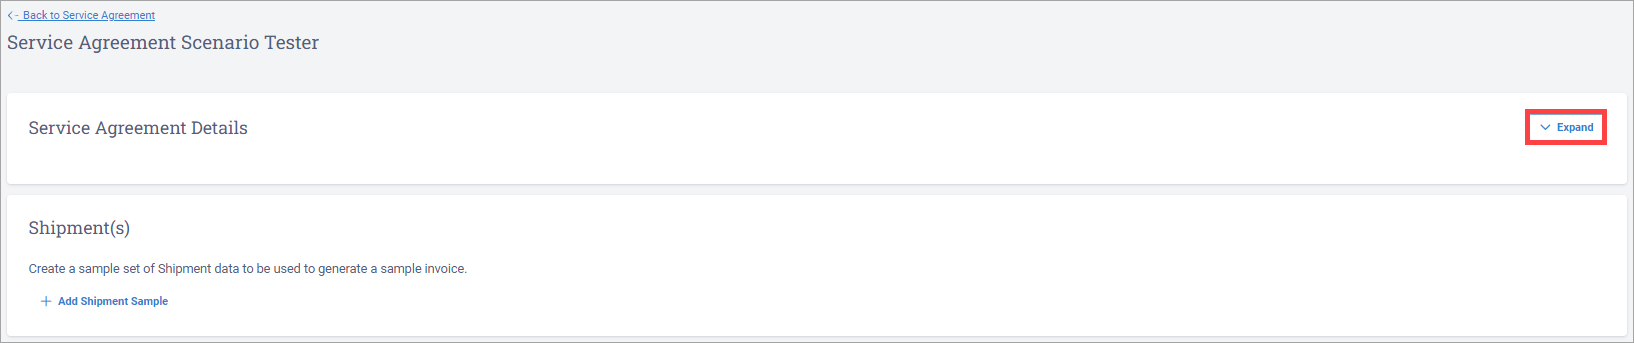
In the top-right corner of the Service Agreement Scenario Tester page, select Expand and verify the service agreement details.
Select Add Shipment Sample.
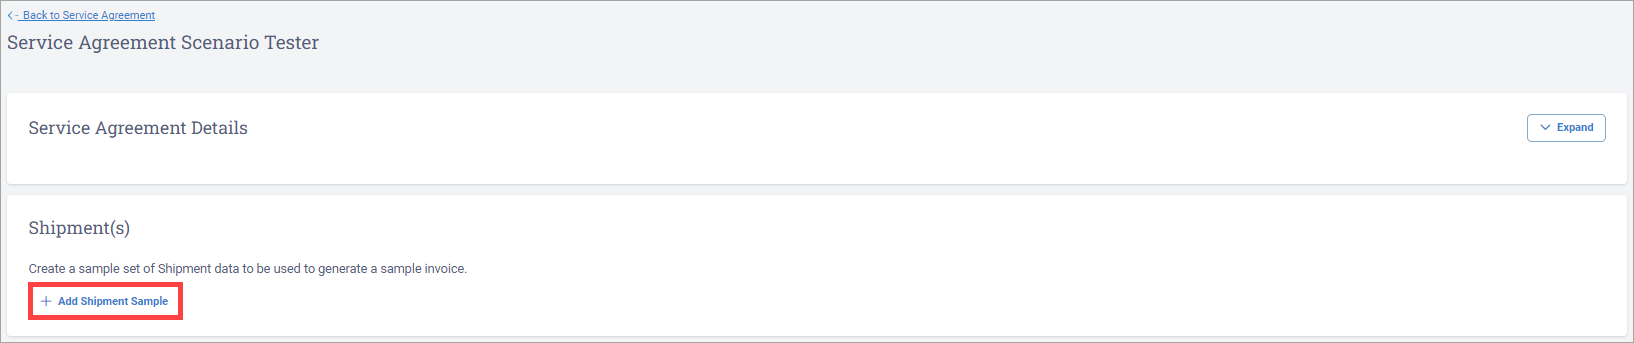
Note
Default shipping data is already entered for you to use.
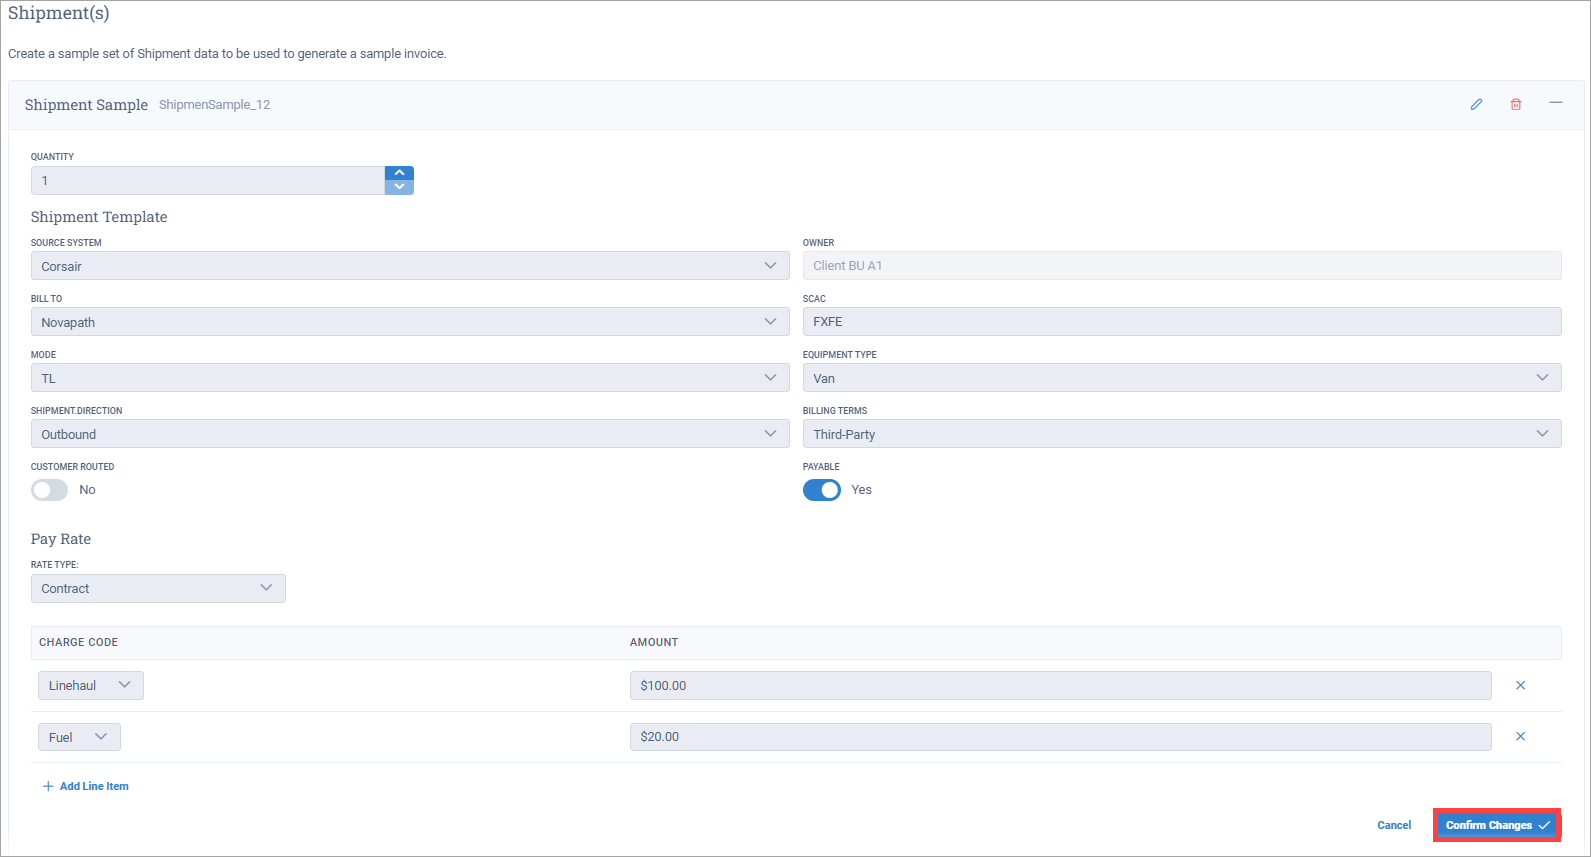
If you don't want to use the default shipping data, you can enter your own shipping data. After you enter your own shipping data, select Confirm Changes.
At the bottom of the page, select Generate Sample Invoice. The sample invoice information displays.
Note
If you want to save or print a PDF of the sample invoice, select Download Summary Invoice.

You can execute a bill run anytime outside of its normal schedule.
On the Service Agreements page, select a service agreement.
In the top right corner of the page, select Run Now.

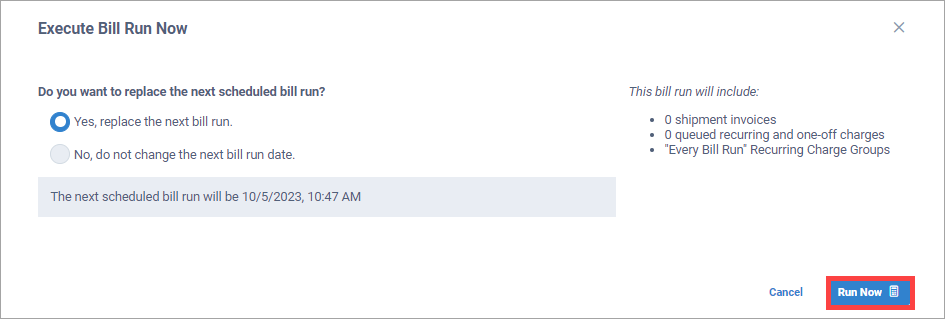
In the Execute Bill Run Now dialog box, select one of the following:
Yes, replace the next bill run - Executing this bill run now will replace the next scheduled bill run.
No, do not change the next bill run date - Executing this bill run now will not replace the next scheduled bill run.
Select Run Now.
On the Service Agreements page, select a service agreement to edit.
Edit the service agreement information.
At the bottom of the Service Agreement page, select Save Service Agreement.
On the Service Agreements page, select a service agreement to delete.
At the bottom of the Service Agreement page, select Delete Service Agreement.