Agents
Agents are intelligent, AI-powered components that simplify integration design and workflow automation in X1. They enable you, especially if you're non-technical, to describe what you want in natural language. The agent then interprets those instructions, configures the flow components, and makes context-aware decisions on your behalf.
In other words, agents make your integrations smarter and easier to manage. By translating your intentions into automated logic, agents eliminate complexity and enable you to create intelligent workflows in X1.
Note
Agents always respect defined Document Types.
Agent use Cases
Validation agent - Validates data using rules defined in natural language (e.g., age between 18 and 100, valid email format).
Enrichment agent - Adds context or values to messages based on a given list and rules.
Invoice Processor Agent - Extracts data (e.g., date, amount, parties) from email attachments like PDF, PNG, or JPEG, and structures it into JSON.
The Agents page is where you can view and create your agents.
On the Agents page, view the list of agents.
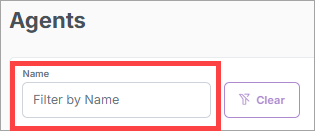
Search for an agent
On the Agents page, you can search for a specific agent using the default search field.
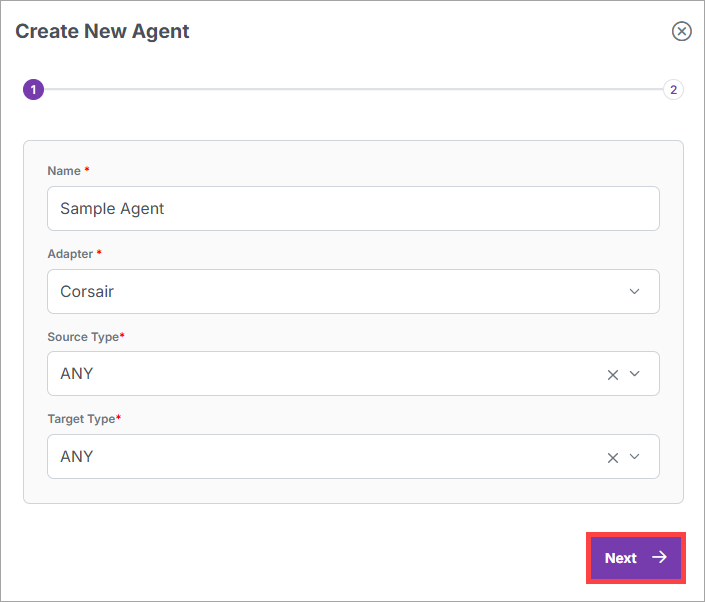
In the top right corner of the page, select New Agent.

In the Create New Agent dialog box, enter the initial agent information, and select Next.
Enter the additional agent information, and select Create Agent. The Agent Details page displays as a draft version of the agent.
In the top right corner of the page, select Approve > Yes to approve the draft.
Note
If you want to delete the draft before approving it, select
 .
.
See the "New Agent Field Descriptions" below for more information about the agent fields.
New Agent Field Descriptions
Name | Enter a relevant name for the agent. |
Adapter | The adapter the router runs in. Adapters provide the runtime environment for components to execute in. They're siloed from each other so that components running in one adapter cannot access components running in another adapter. Adapters provide the ability to scale contexts independently. This can be useful in high-volume scenarios, where one adapter can be scaled up to handle more load while another can be scaled down to save resources. It also allows one adapter to fail without affecting the other adapters. This type of isolation isn't necessary unless there are specific performance or isolation requirements. In most cases, a single adapter is sufficient to handle high volumes of messages. If multiple adapters are available, you must select the adapter in which each component you create runs. If only a single adapter is available, each component is automatically assigned to that adapter and cannot be changed. |
Source Type | The content that the agent expects to receive. |
Target Type | The content the agent expects to produce. |
Content Type | The type of content the agent will process. |
Instructions | A block of natural language text that clearly defines the agent's role, logic, rules, and any training data or examples. NoteThere is no back-and-forth interaction when giving instructions—everything must be included up front. |
Field | Description |
|---|
Refer to the table below for guidance after you've completed the initial steps in the Create an agent procedure above.
Field and tab | Description |
|---|---|
ID | The ID that X1 automatically assigned to the agent, based on the name. The ID is lowercase and replaces spaces with dashes. The ID is permanent and can't be edited. |
Name | The name you assigned to the agent when you created it. |
Adapter | The adapter you assigned to the agent when you created it. |
Request Document Type | The document type passed into the agent to be processed. |
Response Document Type | The document type returned from the agent after processing. |
General tab | |
Instructions | The instructions you assigned to the agent when you created it. |
Model | Select a specific LLM model and provide an API key to use your own model preferences. |
Content Type | The content type you assigned to the agent when you created it. |
Authorization tab | If you want your X1 agents to use an AI model other than Google Gemini select the Use API Key toggle, select an AI Model, and then enter an API Key. |
Flows tab | The list of flows that include the agent. |
In the top right corner of the page, select Import Agent. The Import Agent dialog box displays.
Drag and drop a document, or select Choose and browse to it.
Select Upload. The imported agent information is added to the Agents table.
In the Agents table, do one of the following:
Next to an agent, select
 . The Agent Details page displays the General tab by default.
Select an agent's Name, Model, or Content Type. The Agent Details page displays the General tab by default.
In the top right corner of the page, select New Draft.
Note
If you want to delete the draft before saving it, select
.Edit the agent information.
Note
In the top right corner of the page, you can select Diff to view a side-by-side comparison of your edits with the current version before you select Save.
In the top right corner of the page, select Save > Approve.
Note
When you select Save, your edits are saved as an unapproved draft.
At this point, you can leave the saved draft unapproved if you want to come back to it later to do more editing.
When you want to edit the component again, in the top right corner of the page, select Show Draft to access its unapproved draft.
When you select Approve, the unapproved draft is deployed as the current version.
In the top right corner of the page, you can select the drop-down arrow to revert to a previous version.

To the left of the drop-down list, you can select
 to view when the page was last modified.
Flow runs with agents include the following:
Logged agent actions under the event type: AGENT_RESPONSE
Document outputs produced by the agent.
Select a flow run.
Drag the agent component onto the canvas.
Select an existing agent or create a new one.
Configure the agent and select Save.
Note
After a flow with an agent is triggered, the agent processes the message based on its instructions and content type, and then outputs the result to the next component.
Note
Agents can only be deleted if they are not part of any flow.
Next to an agent, select
 . The Delete Agent dialog box displays.
Select Delete.